Diamond jewelry combines scientific innovation with traditional craftsmanship. While natural diamonds develop deep within the Earth over extremely long periods, lab-grown diamonds are created in controlled environments using advanced technologies that reproduce some of the conditions required for diamond formation. Once a diamond has been grown, it goes through several stages of cutting, polishing, grading, and jewelry manufacturing before becoming a finished ring.
Understanding how a Lab Diamond Ring is made provides useful insight into the technology and skilled work involved in producing modern fine jewelry. From selecting a suitable diamond seed to designing the final setting, every stage contributes to the appearance, quality, and durability of the finished piece.
This guide explains the complete process, including diamond creation, gemstone preparation, ring manufacturing, and final quality checks.
1. Understanding the Science Behind Lab-Grown Diamonds
Lab-grown diamonds are genuine diamonds made from crystallized carbon. They have essentially the same chemical composition, crystal structure, and fundamental physical properties as natural diamonds.
The main difference is their origin. Natural diamonds form underground under geological conditions, while lab-grown diamonds are produced in specialized facilities using controlled manufacturing processes.
Two primary technologies are used:
- High Pressure High Temperature (HPHT).
- Chemical Vapor Deposition (CVD).
Both methods produce diamond material, but they use different approaches to encourage carbon atoms to form a diamond crystal.
2. The HPHT Diamond Creation Process
<text></text>
High Pressure High Temperature technology recreates some of the extreme conditions associated with natural diamond formation.
The process begins with a small diamond seed, which is placed inside a specialized growth chamber along with a carbon source and suitable metal solvents or catalysts.
The equipment then applies extremely high pressure and temperature. Under these conditions, carbon dissolves and gradually crystallizes onto the diamond seed.
Main Steps in HPHT Production
- Seed preparation: A small diamond seed is selected to support crystal growth.
- Material placement: The seed and carbon source are positioned inside the growth equipment.
- Pressure application: The chamber creates the high-pressure environment required for diamond formation.
- Temperature control: High temperatures help carbon dissolve and move through the growth environment.
- Crystal development: Carbon atoms gradually attach to the seed, forming additional diamond material.
- Cooling and removal: The equipment is cooled under controlled conditions before the grown crystal is removed.
The resulting diamond crystal is then prepared for further processing.
3. The CVD Diamond Creation Process
Chemical Vapor Deposition is another widely used method for manufacturing lab-grown diamonds. Unlike HPHT, CVD relies on a controlled gas environment rather than extremely high pressure.
A thin diamond seed is placed inside a vacuum chamber. A carbon-containing gas, commonly methane mixed with hydrogen, is introduced into the chamber.
Energy is applied to create plasma, which breaks down the gas molecules. Carbon atoms then deposit onto the diamond seed and gradually form additional diamond layers.
How CVD Production Works
Step 1: Seed Preparation
A suitable diamond seed is cleaned and positioned inside the growth chamber.
Step 2: Chamber Preparation
The chamber is evacuated to create the required controlled environment.
Step 3: Gas Introduction
Carbon-containing gas and hydrogen are introduced in carefully controlled proportions.
Step 4: Plasma Formation
Energy activates the gas mixture, allowing carbon-containing species to participate in diamond growth.
Step 5: Layer Development
Carbon atoms deposit onto the seed, gradually increasing the diamond’s size.
Step 6: Growth Monitoring
Temperature, pressure, and gas composition are monitored to maintain suitable growth conditions.
After growth, the material may undergo additional treatment depending on its characteristics and intended use.
4. HPHT vs. CVD: Understanding the Differences
Both technologies can produce high-quality lab-grown diamonds, but their manufacturing methods differ.
| Feature | HPHT | CVD |
|---|---|---|
| Full Name | High Pressure High Temperature | Chemical Vapor Deposition |
| Main Method | High pressure and heat | Controlled gas deposition |
| Starting Material | Diamond seed and carbon source | Diamond seed and carbon-containing gas |
| Growth Environment | High-pressure chamber | Vacuum-based chamber |
| Crystal Development | Carbon crystallizes onto the seed | Carbon deposits in layers |
| Post-Growth Treatment | May be used when needed | May be used when needed |
| Jewelry Applications | Suitable for gem-quality diamonds | Suitable for gem-quality diamonds |
Neither method automatically guarantees better quality. The finished diamond should be evaluated according to its individual characteristics, including cut, color, clarity, and carat weight.
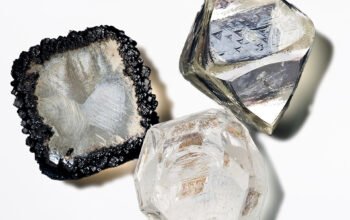
5. Removing and Preparing the Diamond Crystal
Once the growth process is complete, the rough diamond is removed from the production equipment.
At this stage, it does not yet look like a finished gemstone. Rough diamonds may have irregular shapes, surface features, or areas that need further examination.
Specialists inspect the crystal to understand its structure and determine how it can be processed.
What Happens During Preparation?
- The rough crystal is cleaned.
- Its dimensions and internal characteristics are examined.
- Potential inclusions and growth features are identified.
- The best cutting orientation is evaluated.
- A suitable final shape is planned.
This stage is important because cutting decisions influence how much usable diamond material can be retained and how the finished stone will look.
6. Diamond Cutting: Creating the Desired Shape
Cutting transforms the rough diamond into a gemstone suitable for fine jewelry. It requires careful planning and specialized equipment because every cut affects the stone’s proportions and potential light performance.
Before cutting begins, a diamond planner determines the most appropriate shape based on the crystal’s structure, dimensions, and visible characteristics.
Popular Diamond Shapes
- Round brilliant: A symmetrical shape designed for strong brilliance.
- Oval: An elongated shape with a soft outline.
- Princess: A square shape with pointed corners.
- Emerald: A rectangular step-cut design.
- Pear: A teardrop-shaped gemstone.
- Cushion: A square or rectangular shape with rounded corners.
- Radiant: An angular shape with brilliant-style faceting.
The cutting process removes unwanted material and establishes the gemstone’s outline, facets, and proportions.
7. Diamond Polishing: Improving Brilliance and Finish
After cutting, the diamond undergoes polishing to create smooth, reflective facet surfaces.
Polishing is a highly precise process because small variations can affect the way light interacts with the gemstone.
The polishing specialist works on different facets according to the diamond’s planned proportions and design.
Why Is Polishing Important?
A properly polished diamond can display:
- Greater visual brightness.
- Clearer reflections.
- Attractive flashes of colored light.
- A smooth and refined surface.
- Improved overall presentation.
Polish quality is one of the characteristics considered during diamond grading.
8. Diamond Grading and Quality Evaluation
Once cutting and polishing are complete, the gemstone can be evaluated by a qualified grading laboratory.
A grading report helps describe the diamond’s characteristics and provides buyers with information for comparing different stones.
The traditional 4Cs are commonly used to assess diamond quality.
Cut
Cut refers to the diamond’s proportions, symmetry, and polish as they relate to its interaction with light. It is particularly important for understanding brilliance and overall appearance.
Color
Color grading evaluates how much visible body color is present in the diamond. Different grades may have subtle visual differences.
Clarity
Clarity describes internal inclusions and external blemishes. Their size, position, number, and visibility influence the grading assessment.
Carat Weight
Carat measures the diamond’s weight. It does not directly indicate how large the stone will appear from above because shape and proportions also affect visible dimensions.
A grading report may also identify the diamond as laboratory-grown and provide additional information about its characteristics.
9. Designing the Ring Around the Diamond
After the center diamond has been prepared and evaluated, attention turns to the jewelry design.
The ring’s style, metal, setting, and proportions must work together to create a balanced finished piece.
Choosing the Ring Style
Popular designs include:
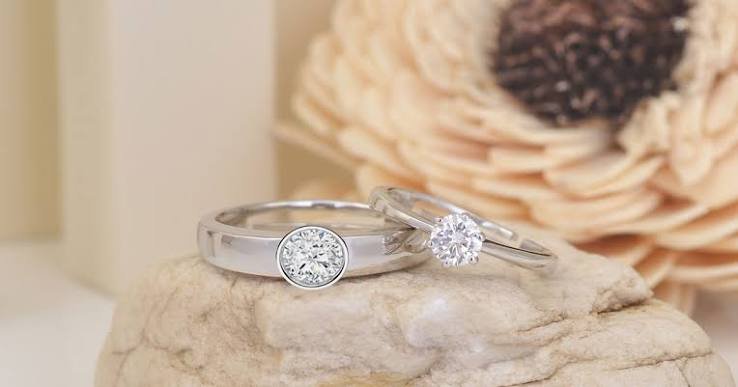
Solitaire: Uses one center diamond for a simple and timeless appearance.
Halo: Surrounds the center diamond with smaller stones for additional decoration.
Three-Stone: Combines a center diamond with two side stones.
Pavé: Features small diamonds set along the band.
Bezel: Surrounds the diamond’s edge with a metal rim.
The choice depends on personal style, diamond shape, and practical requirements.
10. Selecting the Metal for the Ring
The metal forms the structure of the ring and affects its color, weight, durability, and maintenance requirements.
Common options include:
Yellow Gold
Yellow gold provides a warm and traditional appearance. It creates a noticeable contrast with a colorless diamond and works well with classic designs.
White Gold
White gold offers a bright, silvery look that complements many diamond styles. It is commonly finished with rhodium plating, which may need renewal over time.
Rose Gold
Rose gold has a soft pink color created by its copper content. It is often selected for romantic and contemporary designs.
Platinum
Platinum is a naturally white, dense precious metal. It is valued for its durability and is commonly used in high-quality diamond settings.
The selected metal should suit the intended design, budget, and wearing habits.
11. Manufacturing the Ring Setting
The setting is the part of the ring that holds the center diamond and any additional gemstones.
Depending on the design, manufacturers may create the setting through casting, machining, hand fabrication, or a combination of methods.
Common Manufacturing Stages
- Design development: The ring’s dimensions, setting style, and decorative features are planned.
- Model creation: A physical or digital model is prepared.
- Metal preparation: The selected precious-metal alloy is prepared for manufacturing.
- Forming: The ring structure is produced using the chosen manufacturing technique.
- Assembly: Different components are joined where necessary.
- Finishing: Surfaces are refined, edges are smoothed, and the ring is prepared for stone setting.
Precision is essential because the setting must match the center diamond’s dimensions and provide suitable support.
12. Setting the Diamond into the Ring
Once the ring structure is ready, the center diamond is carefully positioned and secured.
The exact technique depends on the setting design.
Prong Setting
Small metal claws hold the diamond in place while leaving much of its surface visible.
Bezel Setting
A metal rim surrounds the diamond’s perimeter, creating a smooth and protective structure.
Channel Setting
Small diamonds are positioned between parallel metal walls, commonly along the band.
Pavé Setting
Tiny accent diamonds are secured using small metal beads or prongs.
The jeweler checks the stone’s alignment and the security of the setting before the ring moves to final finishing.
13. Final Polishing and Quality Control
The completed ring undergoes final inspection to confirm that its appearance and construction meet the required standards.
Quality control may include checking:
- Diamond identity and documentation.
- Center-stone alignment.
- Prong positioning and security.
- Metal finish and surface smoothness.
- Ring dimensions and sizing.
- Security of accent diamonds.
- Overall design consistency.
The ring may also receive a final cleaning to remove manufacturing residue and prepare it for presentation.
Quality checks are important because even a high-quality diamond requires a properly manufactured setting to become a reliable piece of jewelry.
How Long Does It Take to Make a Lab-Grown Diamond Ring?
The production timeline varies depending on whether the diamond has already been grown and prepared or needs to be manufactured from the beginning.
Diamond growth itself can take several days to weeks, depending on the technology, equipment, and desired crystal characteristics. Cutting, polishing, grading, and ring manufacturing require additional time.
A customized ring may take longer than a standard design because it involves additional planning, material selection, and production steps.
Factors that influence the timeline include:
- Diamond size and availability.
- HPHT or CVD production requirements.
- Cutting and polishing complexity.
- Grading and documentation.
- Ring design and customization.
- Metal availability.
- Manufacturing and quality-control schedules.
Buyers should confirm the expected delivery timeline with the jewelry manufacturer or retailer before placing an order.
Are Lab-Grown Diamonds as Durable as Natural Diamonds?
Yes. Lab-grown diamonds have the same fundamental hardness as natural diamonds, measuring 10 on the Mohs scale. This makes them highly resistant to scratching and suitable for regular jewelry use.
However, hardness does not make a diamond impossible to damage. A strong impact can cause chipping or fracture, particularly around exposed corners and pointed edges.
The ring’s setting also contributes to its overall durability. Properly positioned prongs, protective bezels, and secure accent stones help reduce the risk of damage during everyday wear.
Regular cleaning and professional inspections can help maintain the ring’s appearance and condition.
Conclusion
The production of a lab-grown diamond ring involves a combination of advanced technology and skilled jewelry craftsmanship. It begins with diamond growth through HPHT or CVD methods, followed by crystal preparation, cutting, polishing, and grading. The finished gemstone is then incorporated into a carefully designed metal setting and inspected before becoming a piece of fine jewelry.
Understanding these stages helps buyers appreciate the work involved in creating lab-grown diamond jewelry. By considering diamond quality, manufacturing standards, setting design, and metal selection, couples can make informed decisions when choosing a ring that reflects their style and preferences.